Side Dishes
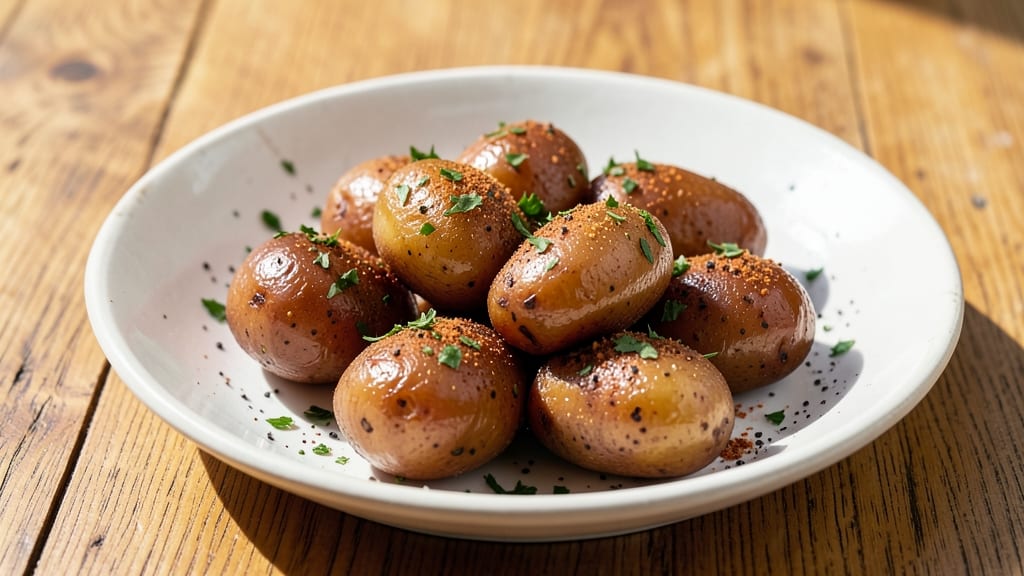
Mastering boiled baby potatoes with a peppery salt crust transforms a simple side into a flavor-packed centerpiece—perfect for elevating any meal. 💛 I first discovered this technique while testing recipes for a busy weeknight dinner, and it became an instant favorite for its simplicity and bold flavor.
The secret lies in the crust: a mix of salt, pepper, and herbs that clings to the tender potatoes, adding texture and depth without extra effort.
This recipe delivers restaurant-quality results in just 20 minutes of active prep, with minimal ingredients and no fancy techniques. Baby potatoes stay intact during boiling, so you avoid the mushy texture of larger spuds.
The salt crust forms during the final step, creating a satisfying crunch that contrasts beautifully with the creamy insides. It’s the kind of side dish that makes even the simplest dinner feel special.
By the time you’re done, you’ll have golden, crispy-edged potatoes with a savory crust that’s impossible to resist. They’re ideal for serving alongside grilled meats, roasted vegetables, or even as a standalone snack.
The method is foolproof—no peeling required, and the crust can be customized with garlic powder, smoked paprika, or fresh herbs for extra flavor. Let’s get started!
This technique works equally well for meal prep or last-minute dinners. Store leftovers in the fridge for up to 3 days, and reheat gently to maintain that perfect texture.
Whether you’re hosting a dinner party or just looking to elevate a weeknight meal, these potatoes will steal the show. Here’s how to make them!
Ingredients for boiled baby potatoes
Nine simple ingredients transform baby potatoes into a restaurant-worthy side dish.
| Ingredient | Amount | Notes |
|---|---|---|
| Baby Potatoes 🥔 | 1 ½ lb | Waxy variety, unpeeled, halved |
| Diamond Crystal Kosher Salt 🧂 | ½ cup | Coarse grain for better adhesion |
| Freshly Ground Black Pepper 🌶️ | 2 tbsp | Freshly cracked for vibrant flavor |
| Dried Parsley Flakes 🌿 | 1 tbsp | For subtle herbal brightness |
| Garlic Powder 🧄 | 1 tsp | For subtle savory depth |
| Smoked Paprika 🌶️ | ½ tsp | Optional for smoky complexity |
| Unsalted Butter 🧈 | 2 tbsp | Full-fat for rich coating |
| Fresh Rosemary 🌿 | 1 tbsp | Chopped, for aromatic finish |
| Water 💧 | 4 cups | For boiling, room temperature |
The baby potatoes are the star—Yukon Golds or red potatoes work best for their waxy texture and even cooking. Grab a 3-pound bag from Trader Joe's or Costco for the best price. If you can't find baby potatoes, halve regular small potatoes (about 1-inch diameter). The key is keeping them whole—they stay intact while larger potatoes turn mushy. For the salt crust, Diamond Crystal kosher salt is ideal (it's coarser than table salt and sticks better), but any kosher salt will work. Freshly ground black pepper makes all the difference—pre-ground loses its punch quickly, so invest in a pepper mill if you don't have one. I always buy a small bag of McCormick freshly ground pepper from the bulk section at Whole Foods for this recipe.
No kosher salt? Sea salt or coarse salt at half the amount works in a pinch, but it won't stick as well to the potatoes. Skip the smoked paprika if you don't have it—regular paprika at the same amount gives a milder flavor. The dried parsley flakes can be swapped for 1 tsp dried thyme or oregano if you prefer a different herbal note. Fresh rosemary is ideal, but 1 tsp dried rosemary works too (just double the amount). For a dairy-free version, use olive oil instead of butter—about 1 tbsp. The butter is non-negotiable for the crust though (trust me on the full-fat version). If you're prepping ahead, boil the potatoes first and store them in cold water in the fridge for up to 2 days before finishing with the crust.
These potatoes reheat beautifully—just toss them in a dry skillet over medium heat for 2-3 minutes to crisp up the crust again. Store leftovers in an airtight container in the fridge for 3-4 days, but honestly, they disappear faster than that. For meal prep, I like to portion them into single-serving containers so they're ready to grab and reheat. The crust gets softer over time, so if you're making these ahead, finish with the crust just before serving. If you're serving at room temperature (like for a picnic), let them cool completely before sealing in containers—they hold up well for up to 6 hours this way.
Why You'll Love This Recipe
- No-Peel Hassle: I swear by baby potatoes because you skip the peeling—just scrub, boil, and go. The skin stays on, so you get that earthy bite without the extra work.
- Garlic-Parsley Magic: That pinch of garlic powder and dried parsley flakes? It’s the secret weapon. Simple, but it turns plain boiled potatoes into something that tastes like you slaved over them.
- Weeknight Sidekick: Toss these with grilled chicken or a steak, and they’re ready in 20 minutes. Honestly, they’re my go-to when I need something that doesn’t require a grocery list or fancy prep.
- Budget-Friendly Staple: A pound of baby potatoes costs less than a salad, and they keep for days. Reheat them in the microwave or oven—no waste, just easy, reliable meals.
Step-by-step instructions for crispy peppered baby potatoes
Here's how to transform simple boiled potatoes into restaurant-worthy bites with a bold, peppery crust.
🍳 Step 1: Boil the Potatoes Until Fork-Tender
Place the 1.5 lb baby potatoes in a large pot and cover completely with the 4 cups water. Add 1 tbsp dried parsley flakes and 1 tsp garlic powder to the water—they'll infuse the potatoes with subtle herbal notes as they cook. Bring to a rolling boil over high heat, then immediately reduce to medium-high and cook for 12-15 minutes until a knife slides in easily.
Here's the thing—don't skip the initial hard boil. Those first few minutes create steam that helps the potatoes cook evenly. Once they're tender, drain them in a colander and let them steam-dry for 2 minutes—this step prevents soggy crust later. I know it seems counterintuitive, but those few seconds make all the difference for that crispy exterior.
👨🍳 Step 2: Create the Peppery Salt Crust
While the potatoes are still warm, transfer them to a large bowl. Add the 0.5 cup Diamond Crystal kosher salt and 2 tbsp freshly ground black pepper, then gently toss to coat completely. The coarse texture of the kosher salt creates those signature crunchy pockets, while the freshly cracked pepper delivers vibrant heat. Add the 0.5 tsp smoked paprika and toss again—this gives the crust a subtle smoky complexity that elevates everything.
Don't be shy with the tossing. You want every potato to be thoroughly coated, with no dry spots. The salt will start to melt slightly from the residual heat, creating that perfect crust. I like to use my hands for this part—it gives me better control than a spoon. If you're making these ahead, let them sit for 5 minutes before proceeding so the salt has time to adhere properly.
🔥 Step 3: Melt the Butter and Rosemary Finish
In a separate skillet, melt the 2 tbsp unsalted butter over medium heat until it's fully liquid but not browned. Add the 1 tbsp chopped fresh rosemary and let it sizzle for 30 seconds—this infuses the butter with aromatic flavor. Pour this fragrant butter mixture over the salted potatoes and toss gently to coat evenly. The butter will melt into the crust, creating a rich, cohesive coating that ties all the flavors together.
Here's where it gets good—the butter adds moisture to the crust without making it soggy. Toss the potatoes just until they're evenly coated, then let them sit for 2 minutes so the butter can fully distribute. You'll notice the crust developing that beautiful golden hue with dark pepper flecks. This is your visual cue that everything's coming together perfectly.
⏰ Step 4: Roast for Extra Crispiness (Optional but Recommended)
For maximum texture, transfer the potatoes to a parchment-lined baking sheet and spread them in a single layer. Roast in a 400°F oven for 10-12 minutes until the crust is deep golden brown and crispy in spots. Watch them closely—they'll go from perfect to burnt in minutes. The roasting intensifies the flavors and creates that satisfying crunch that makes these potatoes irresistible.
If you're short on time, you can skip this step and serve them immediately after the butter coating. They'll still be delicious, but the roasted version has that extra dimension of texture. Either way, let them rest for 3-5 minutes before serving—this allows the flavors to meld and the crust to set properly. Serve warm as a side dish or snack straight from the pan for maximum flavor impact.
Pro Tips For Making Boiled Baby Potatoes
- Peel First, Boil Later: Baby potatoes have thin skins that can turn rubbery if left on—especially if you’re boiling them. I learned this the hard way when my first batch came out tough. Use a paring knife to nick the skins (don’t remove them completely), then boil them whole. The skins will peel off effortlessly after cooking, and the texture stays buttery.
- Start Cold, End Hot: Cold water is your friend here. Toss the potatoes into a pot of cold water (not hot) and bring to a boil—this keeps them from cracking or turning mealy. Once boiling, reduce to a simmer and cook until a knife slides in like butter. (Yes, even if you’re impatient like me.)
- Salt the Water Like the Sea: Diamond Crystal kosher salt is less dense, so don’t eyeball it—use about 1½ teaspoons per quart of water. This ensures the potatoes absorb flavor, not just water. I used to skimp, and the results were bland. Trust me, the salt makes a real difference.
- Poke First, Avoid Explosions: Baby potatoes can trap steam and burst like tiny grenades if they’re whole and unpunctured. Use a fork to make a few shallow holes in each one before boiling—this keeps them intact and prevents a messy pot. (Your future self will thank you.)
Make-ahead tips for boiled baby potatoes
Boil-Ahead Prep
Boil the potatoes up to 2 days ahead and store them in cold water in the fridge. This keeps them from drying out or absorbing fridge odors. When ready to finish, drain them thoroughly and pat dry with a kitchen towel.
The cold water preserves their texture, so they'll still be firm and ready for the salt crust. I do this all the time for busy weeknights—just reheat the crust step when you're ready to serve. 💡
Crust Customization
Make the crust up to 1 day ahead and store the coated potatoes in an airtight container. Reheat them in a 350°F oven for 5-7 minutes to revive the crust's crispiness. For extra flavor, add 1 tsp lemon zest to the crust mix—it brightens the peppery notes beautifully.
I've also experimented with 1 tbsp grated Parmesan in place of some salt for a savory twist.
Portion for Perfection
Divide the finished potatoes into single-serving containers for easy grab-and-go meals. The crust stays intact when stored this way, so you can reheat just what you need. I like to portion them into 1-cup containers—perfect for a quick snack or side dish.
For meal prep, finish the crust fresh before storing to maintain that satisfying crunch. 🌟
Freezer-Friendly Option
You can freeze these potatoes for up to 1 month by coating them in the crust mix, then spreading them on a baking sheet to freeze solid. Once frozen, transfer to a freezer bag. To reheat, bake from frozen at 400°F for 15-18 minutes until crispy.
The texture won't be quite as perfect as fresh, but it's still delicious for a quick meal. I've used this trick for lazy Sundays when I don't want to cook from scratch.
Picnic-Perfect Prep
For outdoor meals, let the finished potatoes cool completely before packing them in an airtight container. They'll hold up well for up to 6 hours at room temperature, making them ideal for picnics or potlucks.
Pack them in a thermos-style container to keep them warm if you're serving them immediately. The crust stays intact, so they're just as satisfying cold as they are hot. 🥔
Nutrition facts
Frequently asked questions
Why do baby potatoes need to be boiled instead of roasted?
Boiling baby potatoes creates a tender, creamy interior while keeping them intact—larger potatoes often break apart when boiled. The steam from boiling also helps infuse the potatoes with subtle flavors from herbs in the water. Roasting works too, but boiling gives you more control over even cooking and prevents the skins from burning before the centers are done.
Can I use regular potatoes instead of baby potatoes?
Yes, but you'll need to halve or quarter them first to match the size of baby potatoes. Regular potatoes have more moisture and starch, so they'll take 5-7 minutes longer to cook. Yukon Golds or red potatoes work best—they hold their shape better than russets. Just be sure to cut them evenly so they cook at the same rate.
What if my potatoes turn out mushy?
Mushy potatoes usually happen from overcooking or not draining them properly after boiling. Always drain them in a colander and let them steam-dry for 2 minutes before adding the salt crust. For extra insurance, boil them in well-salted water (about 1 tbsp salt) and check for doneness with a fork at 12 minutes. The crust step won't fix mushy potatoes, so focus on perfect boiling first.
How can I make these potatoes spicier?
Add 1-2 tsp cayenne pepper or 1 tbsp crushed red pepper flakes to the salt crust mix for serious heat. For a smoky kick, increase the smoked paprika to 1 tsp. You can also toss the finished potatoes with 1 tbsp hot sauce or sprinkle with chopped jalapeños right before serving. The butter in the crust helps balance the heat beautifully.
Are these potatoes kid-friendly?
Skip the smoked paprika and reduce the black pepper to 1 tbsp for a milder version. Kids love the crispy salt crust—it's like edible potato chips! Serve them warm with a side of ketchup or yogurt dip for extra appeal. The butter and rosemary flavors are subtle enough that picky eaters usually approve.